Xero Onboarding
1. Go to Epos Now HQ using the link (https://www.eposnowhq.com) and log in.
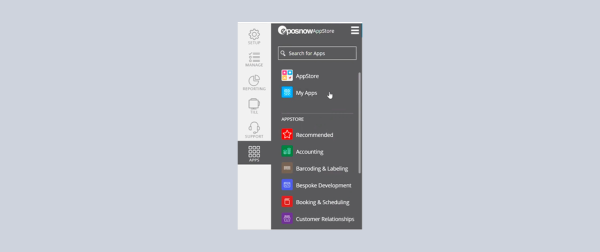
2. Once you are logged in to Epos Now HQ, Click on APPS section and then My Apps
3. Choose the Xero app for SETUP, by clicking on the SETUP written below the app. If you don’t see the Xero App on your account, make sure to install it by going to the AppStore. The old app (discontinued) app is with the name XERO (Epos Now). The new Xero App is available on Page 2 of the App Store and is with the APP Name “Xero”. You can also confirm if you are on the new app or not by going to the link (https://www.eposnowhq. com/Apps/App/961). If the app shows as installed, then you are on the latest version and need to finish the configuration of the new app. if the new app is not installed, install the app by clicking on the “Buy App” button.
4. If a dialogue box opens to SELECT DEFAULT LOCATION (Please specify the location for which you want to do the mapping). Double click on the location and it will lead you to another screen.
5. Establish the connection to the Xero Application by entering email address and phone number and click on Connect Button.
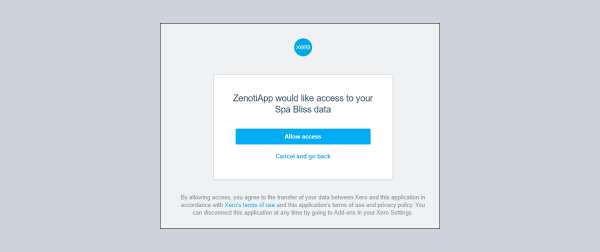
6. With the click of Connect Button, If you have a single organization created for your business on Xero, you will see the following window:
However, if you have multiple organizations created for your business on Xero, you will see the following window:
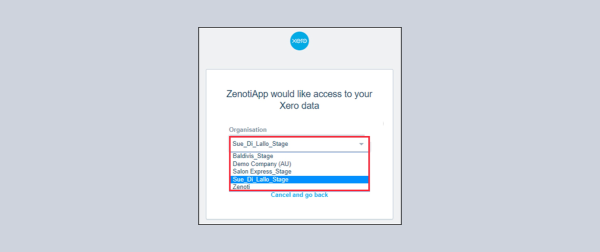
Select the organization to which you want to give access to Epos Now.
7. Click Allow access.
Epos Now now has access to your Xero account and you will see the following message
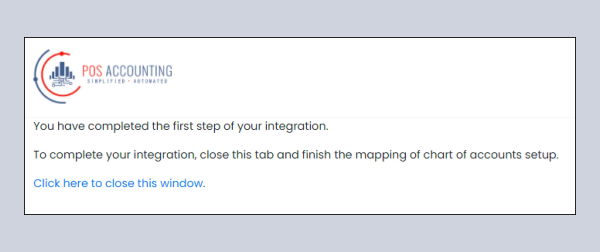
8. To close the window, click Click here to close this window
9. Next Step is to configure how the data will be transferred from Epos Now to Xero. If you need help in the configuration, you can schedule a call with the integration specialist using the link (https://calendly.com/posaccounting/30min). There are 4 options to select from:
a) End of Day Summary Sales Invoice by Products - Accounting will create an invoice with your daily sales summary that will be sent along with the respective payment methods. Your product sales will be reported and mapped individually.
b) End of Day Summary Sales Invoice by Categories - Accounting will create an invoice with your daily sales summary that will be sent along with the respective payment methods. Your product sales will be grouped by category.
c) Individual Customer Sales Invoice by Products - Accounting will create an invoice for each transaction done in the Epos Now that will be sent along with the respective payment methods. Your product sales reported and mapped individually.
d) Individual Customer Sales Invoice by Category - Accounting will create an invoice for each transaction done in the Epos Now that will be sent along with the respective payment methods. Your product sales will be grouped by category.
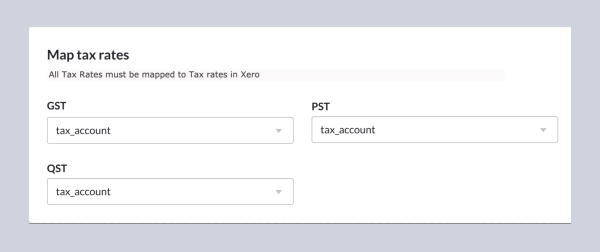
10. Mapping of the Tax Rates
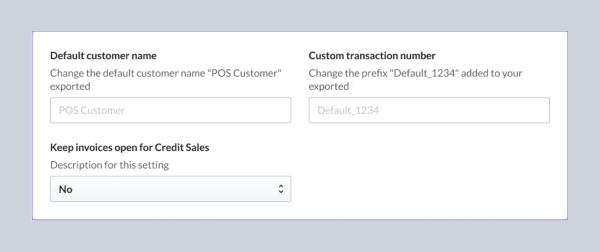
11. Miscellaneous Settings
12. Click on Save Changes to save your settings

13. The configuration has been saved and the new app is ready for your use.
14. The app doesn’t allow the syncing of historical data. It automatically starts syncing the data on the close of till. Only 7 days of the historical data sync is available. In order to submit a request for historical data sync, use the Chat tool (in the app) or send an email to support@posaccounting.co
15. IMPORTANT: Uninstall the old app with the name “Xero (Eposnow)” after the configuration of the new app is complete to prevent any data issues.